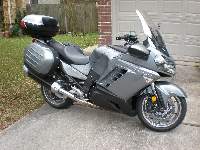
2008 Kawasaki Concours 1400
AKA: C14, Connie
By David Johnson
|
|
|
|
DJ's Farkel Log:
|
02/17/2008 - Less than 24 hours after my bike was un-crated and built, I turned the first wrench. No, I’m not a grease monkey, nor do I claim to even be a shade-tree mechanic. I don’t have a whole lot of fancy tools in the garage either. Most of the time, I’m happy to pay someone else to do the dirty work. But, when it comes to my motorcycle, I find it helps the relationship if you give them as much personal attention as possible.
The name Quick Silver seems to suit the bike and so that’s what we named her.
|
|
Note: Click on any of the following small pictures to see the full size image.
|
|
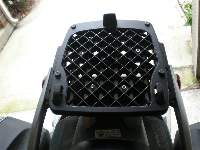
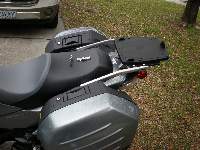
Phil’s Luggage Rack:
First order of business was to replace the luggage rack with one of Phil’s excellent replacement racks. No, big deal; unscrew 4 bolts, lift off the stock luggage rack, drop-in Phil’s rack and replace the bolts. This is a very easy modification and well worth the price. All you need is an metric Allen wrench set. The new aluminum rack looks way sharper than the stock one. [Phil's Farkels - phham81@sbcglobal.net]
|
|
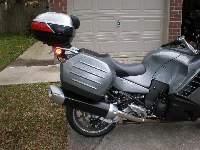
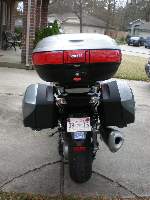
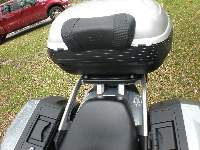
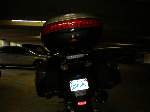
GIVI Top Box:
02/21/2008 - I received my new GIVI top box (E52G730 in silver), GIVI universal mounting plate (E250), GIVI Back Rest (E95S) and GIVI Stop Light kit (E97). Currently the Silver GIVI is as close as I can come to matching the color of the bike in a E52 top box from GIVI. I could have dropped down a size to the E46 and had it color matched. But, I want all the space I can get when I’m packing two-up, for several days or a week. I’ve gotten all the GIVI stuff installed except the light kit, figured I’d save that for another day. [RL Motorcycles http://rlmotorcycles.com 1-229-228-0253]
|
Installation Notes:
Installing the GIVI back rest on the new GIVI top box lid was a challenge using a standard screwdriver. After several attempts I finally wised-up and grabbed a cordless drill and put a screwdriver bit in. The spinning screw quickly caught the threads in the back rest. The second screw was a snap using the drill as a powered screwdriver. Before installing the back rest, you have to get use to the idea that I your actually going to drill two holes in a brand new top box. I quickly moved past that and grabbed the drill.
The GIVI universal mounting kit comes with brackets more suited for an ATV than the C14. I replaced the crooked little bottom plates with some big old flat washer I had handy. Someday I need to find some better flat washers, the ones I used had a hole that was too big. I made it work with a couple of little brackets I had in the junk drawer. I figure they might be good bungee cord hooking point. The guy I bought the GIVI stuff from told me that GIVI is set to introduce a mounting plate made for the C14 in a few months. But, I didn’t want to wait.
See below for details on the GIVI Lighting Kit.
|
|
|
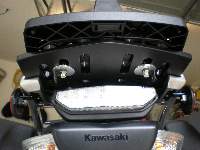
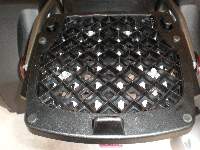
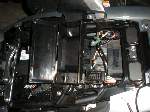
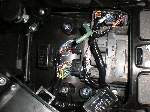
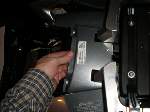
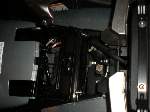
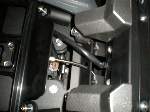
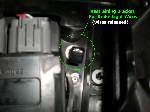
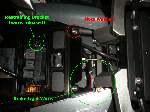
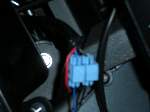
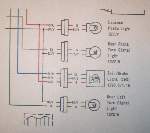
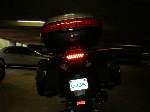
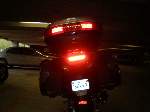
GIVI Lighting Kit:
03/20/2008 - With my first long trip (1400+ miles in 3 days) coming up, I finally tackled installing the lighting kit for the GIVI 52. The instructions that came with the Givi light kit were minimal and that may be stretching it a bit. I didn’t have any trouble with removing the plastic pieces (knock outs) from the Givi box or Givi mounting plate. I had to fiddle with it a little to get the wire and lights in the box. But, the instructions were helpful for this part. The part that I really could have used some details on is where exactly the wires are to tap into the brake light. I’m not a mechanic and when you remove the seat you’re immediately faced with a dozen small bundles of wires off the main wiring harness. I searched the internet high and low for which bundle I should be looking for. Ever wonder what it looks like under the tool pouch holder? After several hours, I started to look for a way remove pieces closer to the brake light. I removed 2 screws and 1 small panel and there they were, pretty as you please. It is a small bundle with just a red, blue and black with yellow stripe wire in it. There was a wire restraining bracket (under the little foam block with the extra wire harness connectors stuck in it) that I had to release, to get enough wire to work with. I ended up cutting about 10 inches off the Givi wires. I put the light blue taps on the blue and black with yellow strip wires (Blue to blue and black to black). Because the Givi brake lights are not LED, it does not matter if the wires are reversed. I took some electrical tape and wrapped the area where I put the taps and then re-hooked the wire restraining bracket. Put everything back the way I found it.
|
Installation Notes:
See the photos or above to get to the brake light wires.
|
|

|
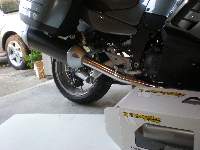
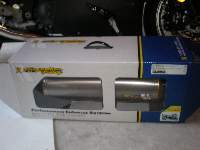
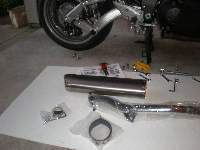
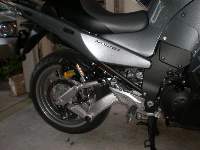
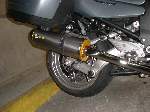
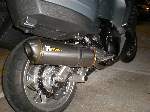
Two Brothers M-5 Titanium Exhaust Pipe:
02/27/2008 - Last night I installed a Two Brothers M-5 Titanium. I was surprised by the weight of the stock muffler. Not hauling around all that extra weight makes this a great upgrade. I was a little surprised at how loud the new Two Brothers pipe is. It’s not too loud, but just louder than I had thought it would be. My previous bike (1997 Intruder 1400) was jetted and had straight pipes. So, I’m not exactly opposed to the idea of loud pipes to begin with.
|
Installation Notes:
The hole for the center stand stop (round rubber thing on the stock muffler) was too small on the Two Brother pipe. You have to remove the center stand stop from the stock muffler and pop it into the hole on the Two Brothers pipe. After trying everything (spit, WD40, elbow grease, sweat, etc.), I just shaved a little flat slice off the part that pops through the hole. A little gentle persuasion with a flat bladed screwdriver and it popped right in the smaller hole in the Two Brothers pipe. It seems to still be a tight fit and in no way in danger of falling out.
|
|
|
Tank Protector Pads:
I know new finishes on fuel tanks are pretty tuff. But, I’d sure rather look at a tank pad than a scratch. [Tech Spec USA 916-941-6606 www.techspec-usa.com Part#62-0037SS].
|
Installation Notes:
It has to be above 70oF to install these. Install side pads first and then install the middle one. This gives you a better shot as centering the center one between the side ones.
|
|
|
|
Heli Bars:
When it comes to major safety components, I let the professionals do it when I can. So, when I got my first service done I let the guys at the Kawasaki shop install the Heli Bars. These are great! They make the ride a lot more comfortable and I don’t feel like I am leaning over the tank to keep my hands on the handle bars. [Heli Bars www.helibars.com 1-800-859-4642 part# HR3705]
|
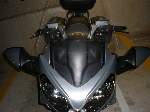
CalSci Windshield:
The wife hates the turbulent air when we ride two up. I am all of 5’-7” and I can’t seem to find a quite spot without leaning down over the tank with the wind shield all the way up. I guess we’ve been spoiled, having ridden cruiser style bikes with huge windshields for so long. I can ditch the ear plugs when I install the new wind shield. I got the CalSci +6 wind shield. It’s great for me and the wife. [CalSci 1-800-284-8112 http://www.calsci.com/motorcycleinfo/Concoursprod.html Large: height +6]
|
Installation Notes:
The installation was fairly easy with a couple of allen wrenches. Note the orientation of the outer parts that hold the windshield. They can be mounted upside down.
|
|
|