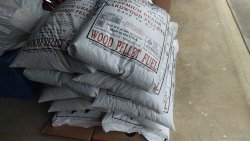
The goal: To build a pellet bin that would easily fill the pellet bucket as needed without needing to handle the 40# bags each time.
Design constraints for this project:
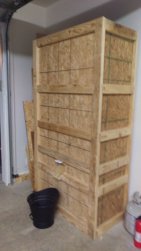
- I wanted to buy pellets and load load the bin just once or twice a year. The minimum I wanted it to hold was about 20 (40#) bags (800# ttl). As is, the finished pellet bin will hold between 25 (1,000# ttl) and 30 (1,200# ttl) bags of wood pellets.
- The bin had to fit into the garage and take-up as little space as possible. A small foot print of just 24" from the wall and 3'-6" wide was negotiated with the Misses. This makes the bin 7'-0" tall. Thankfully, we have 10' ceilings in our garage (this design should be good for a 4'-6" wide by 6' tall bin if needed).
- The chute had to be a minimum of 18" off the floor for the pellet bucket to fit under it.
- The floor of the bin needs to be sloped to get all the little pellets to flow out the chute. Otherwise, with a flat floor, you end-up with about 60# of pellets that will not feed out of the chute.
- (13) 2"X4"X8'-0" studs
- ( 3) Oriented Strand Board 7/16"X4'X8' (roof decking)
- ( 1) 6" picket (as in fence)
- (2#) 2" dry wall screws
- (2#) 3" dry wall screws
- Elmer's Glue (white stuff)
- DAP Weldwood 3oz Bottle of Contact Cement
- ( 6) hot glue sticks
- Guerrilla tape
Tools used:
|
|
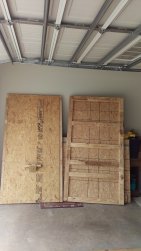
And so, the project begins:
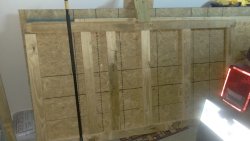
I built the front and back sides first. The horizontal 2"X4"X3'-6" members are set into the 7' vertical corner pieces to keep everything flat as possible. The plywood is cut to 38"X7'-0" and glued (Elmer's) and screwed to the 2"X"4 outer bracing. Next I cut the side members. These were cut as 21"X7'-0" for the plywood and 21"X2"X4" bracing members.
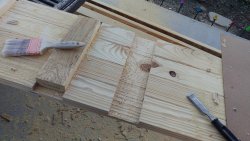
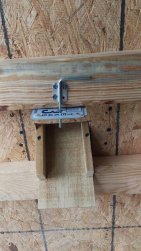
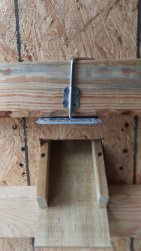
The chute is made from part of a 6" picket and a left over 2X4 chunk (about 12" wide). The opening for the chute/gate is 3"X3". I relieved a 3/32"X4" wide area across the top for the gate to slide in above the opening. On top of this I placed a piece if picket with a 3"X3" hole in it. I used contact cement, 2" screws and hot glue to put it together.
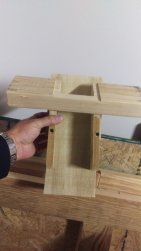
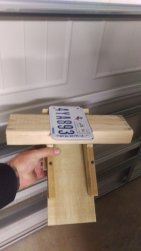
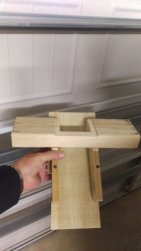
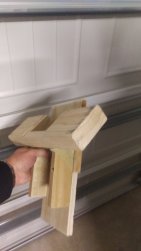
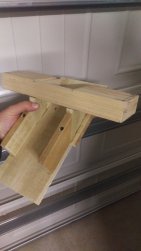
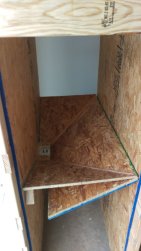
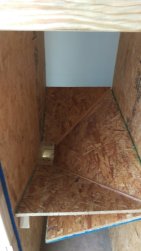
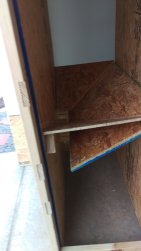
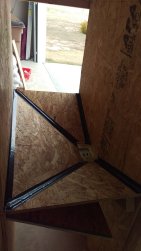
Then, I cut the hole in the front pannel for the chute to come through. The gate is just an old motorcycle license plate (the flat kind without stamped letters). I bent about 1/8"X3" section of the inward part of the license plate lip down to catch and keep the gate from coming all the way out when pulled. The photos below are of the inside of the pellet bin.

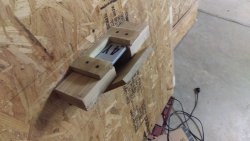
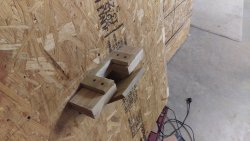
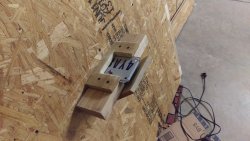
The sloped floor was the hardest part of the build. I left the sides off until last to make the floor build easier to manage. The angles were challenging. There is blocking (2'X4") on all insides to help support the bottom. I used guerrilla tape on all floor seams to ensure no pellets get hung there. Yes, I had to lay it down and crawl up in there to tape the last seam.
Click the image below to see it in action
~~~ That's All Folks! ~~~
